The Case Management module is a central location for you to record all activities relating to each case. You can easily add, organise, and view all your case documents, emails, attachments, and tasks within a digital case file.
The Case Management module is made up of the following sections:
- Case Summary
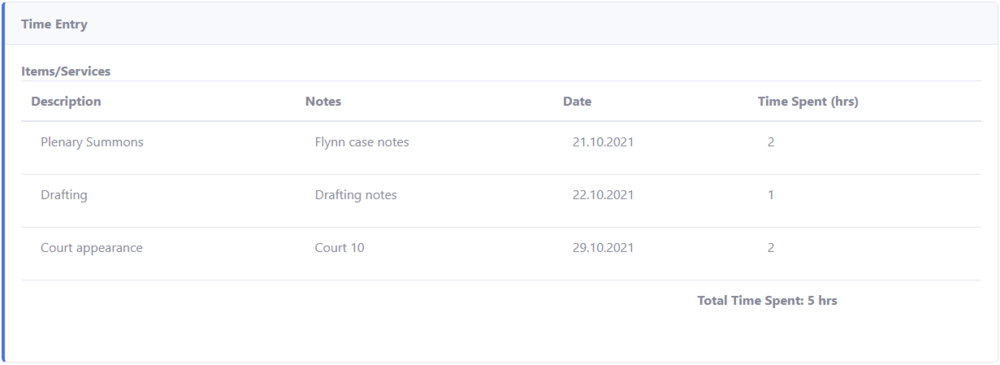
- Time Entry
- Case Correspondence
- Task List
- Creating a Case File
- Editing a Case File
- Adding a Time Entry
- Editing the Case Correspondence section
- Pinning Emails & Attachments to the Case File
- Additional Case File options
Case Summary
The Case Summary section is an overview of the case details.
Editing the Case Correspondence section
- Select Browse files
- Browse to the folder that stores your files i.e. OneDrive – Law Library
- Select the file(s) and press Open
You can also drag and drop any file to this section.
Notes:
- You delete a file from this section, by hovering over the green the tick and press the red x
- You can download a file by selecting the blue download button
You can also add attachments. These would normally be image or other files relating to the case. Its designed so you can keep various types of data separated.
Press Save to save the case file.
Pinning Emails & Attachments to the Case File
Barrister CMS integrates with your Law Library or personal email account. Once you add your account you can then pin emails and email attachments to a case file.
To pin files to a case:
1. Select Mailbox from the sidebar
2. From within the Mailbox, click on the email.
a: Select Pin mail to Case to pin the email to a case file
b: You can also pin all attachments or individual files
3. After you press Pin to Case, the following screen will appear:
Press the dropdown arrow and select the case you want to pin the attachments to.
Select Pin
Additional Case File options
You can also Create a Fee Note from within the case file.
The Pin to Toolbar option allows you to pin the case to the dashboard.
Page last edited – 16/11/21


